Table Of Content
On the other hand, if you want a cute and pastel design, you’re going to love this coquette Hello Kitty cake. In order to get the neatest result, you should make sure your first side has set in the fridge before moving to the next color. That way, you’ll avoid any buttercream leaks between the two colors. This duo Hello Kitty cake is the perfect design if do not want to choose between a girly and a goth design. If you’re looking for something that’s both cute and elegant, you’re going to love this drip cake design. Heart molds are an easy way to elevate the look of your cakes as a beginner.
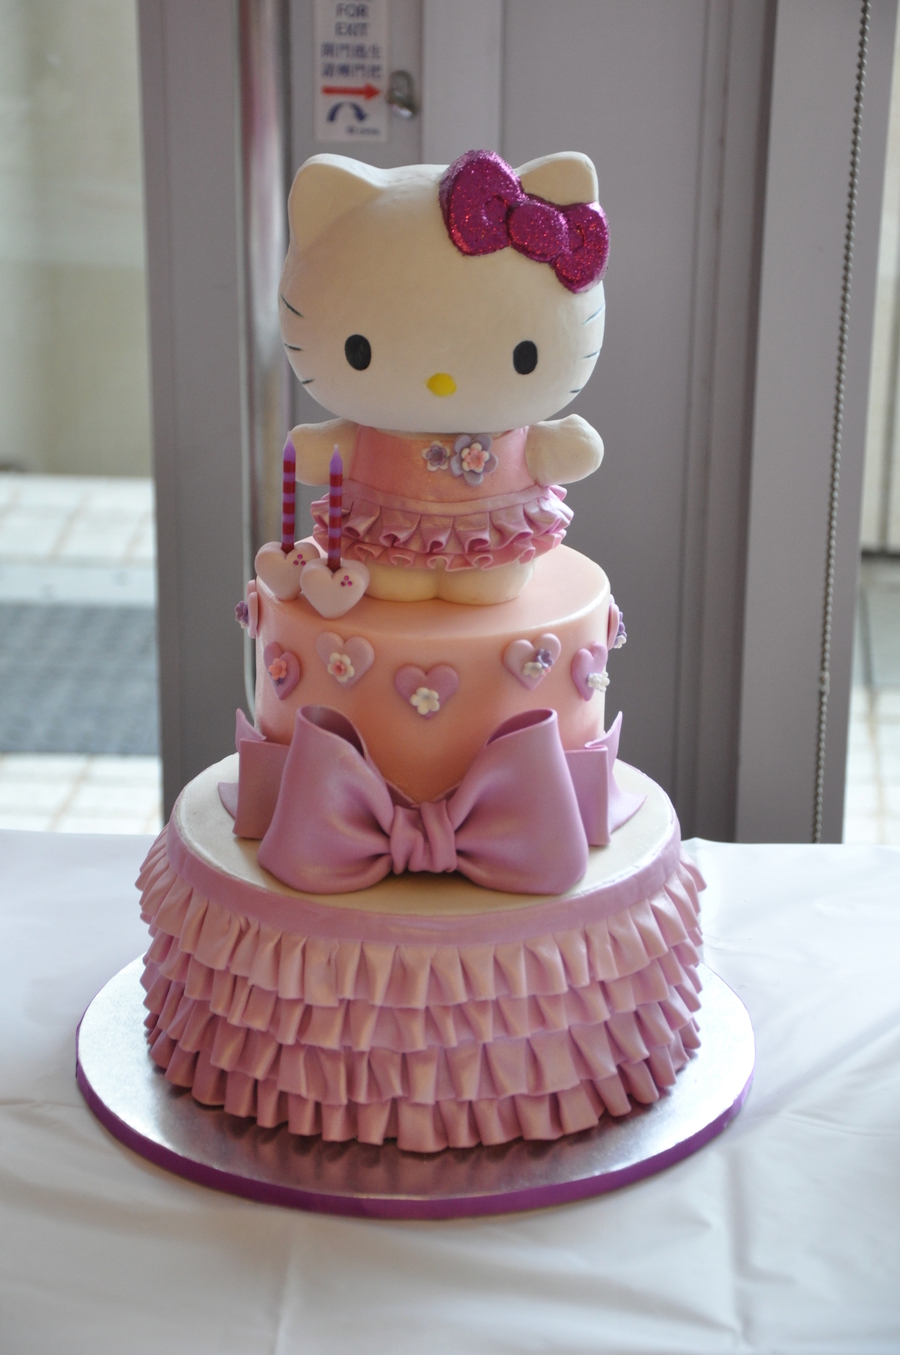
The Hello Kitty Birthday Cake
15 Themed Cafes in Seoul that Are Too Awesome to Resist - TripZilla
15 Themed Cafes in Seoul that Are Too Awesome to Resist.
Posted: Tue, 14 Mar 2017 07:00:00 GMT [source]
Then, we’ll delve into the step-by-step process of baking the perfect cake for the Hello Kitty design, offering guidance on achieving the ideal shape and size. I made this Hello Kitty birthday cake for my daughter’s 2nd birthday. I used strawberry cake mix and baked it in a Hello Kitty pan you can purchase in several stores. The bow is made of marshmallow fondant I made a day before with a little bit of red food coloring to color it pink.

Step 3: Attach the Pink Stripes on the Cake
With a food glitter-gel I wrote her name and age at the bottom on the side. My little girl loved and was all exited about her birthday cake. For the top tier of the Hello Kitty birthday cake, I started by putting the birthday girl’s name on first. I cut out the letters in white fondant and attached them to a pink fondant plaque with shortening. I attached the plaque to the front side of the cake and then added a border to it in the same pink fondant (image 1). If you know someone with excellent palette knife painting skills, then let’s see them put these to good use.
This Angry Bird Manicure Is The CUTEST Single Nail Accent — And It's Easy Enough To Do At Home - LittleThings
This Angry Bird Manicure Is The CUTEST Single Nail Accent — And It's Easy Enough To Do At Home.
Posted: Wed, 09 Dec 2020 16:04:34 GMT [source]
Related cakes:
Jelly cakes, however, can’t be too large since they need molds to take shape. You can also just print or get little Hello Kitty paper toppers to put on the buttercream swirls of your number cake. Take the Hello Kitty cake pan, turn it upside down and gently tap it to a hard surface (like a table). Be careful, though, that the bow doesn’t break when it hits the table. It’s better to let it fall on your hand rather than on a hard surface. Start with a low speed so that the powdered sugar doesn’t catapult all over your kitchen.
Beautiful Hello Kitty Cake Ideas For Beginner And Pro Bakers.
However, I am pretty meticulous with the gumpaste modeling, so Hello Kitty has to be done perfectly and all the other fondant or gumpaste elements have to look well-sculpted. Whether you’re simply looking for inspiration or want to recreate one of these cakes yourself, you’re in the perfect place. Here you’ll find 16 Hello Kitty Cake Ideas perfect for a birthday, including easy designs with instructions to recreate them. Aside from a great Hello Kitty cake, you can also create birthday cupcakes to supplement your Hello Kitty birthday cake. Make a high tower by creating plenty of birthday cupcakes for the party.
Coloring the Frosting
To have a Hello Kitty birthday cake is something fans look forward to on their special day. Overall, the fine-tuning and detailing stage of decorating a Hello Kitty cake is where creativity truly shines. By utilizing texturing techniques, shading methods, and adding small details with precision and care, decorators can elevate their cake from ordinary to extraordinary. On this Hello Kitty cake roll, you will draw designs with some cake paste. When you are making the paste, it is very important to make sure there are no lumps.
From the scraps I made the ears and hair bow.I used a basic star tip and buttercream frosting. Once you have colored the fondant, shape each portion into the respective elements of Hello Kitty’s face – her bow, eyes, nose, and whiskers. Use reference images of Hello Kitty to ensure accuracy in shaping these features. Finally, set aside the prepared fondant pieces until it’s time to assemble them onto the cake.

Using a piping bag fitted with a small round tip, you can carefully trace the outline of these elements onto the fondant surface of the cake. Stay tuned for our next section where we delve into different decorating techniques for bringing out that unmistakable Hello Kitty charm. Next, using a sharp knife, begin shaping the cake into an oval shape, with slightly tapered sides at the top for Hello Kitty’s head. Trim off any excess cake as needed to achieve the desired shape. Once shaped properly, apply a crumb coat of buttercream frosting to seal in any loose crumbs and create a smooth surface for decorating. Invest in a set of piping bags and various decorating tips to add intricate details to your Hello Kitty cake.
Find the perfect Hello Kitty cake idea for your baking skills.
Hello Kitty has been around for almost five decades, but she’s still one of the most well-recognized and well-loved cartoon characters to this day. In fact, the Hello Kitty franchise is one of the highest-grossing of all time. And it’s not just little girls who are Hello Kitty fans; even grown-ups are into her.
One of the key elements in this stage is adding texture to different parts of the cake. Are you a fan of the adorable and iconic Hello Kitty? In this blog post, we will be exploring the fascinating world of decorating a Hello Kitty cake. Starting with the side of the cake without the design, carefully roll up the warm cake in the towel. Doing this while the cake is still warm will mold the cake into a rolled shape and makes it easier to roll it back up later with the filling. Carefully invert warm cake onto a piece of parchment backed by a solid surface like a large cutting board.
If you’re not used to drawing buttercream hearts, strawberries, and rainbows, you should practice on parchment paper, until you feel confident enough. If you’re looking for a cake that will stand out from the crowd without being too difficult to recreate, this is the perfect Hello Kitty cake for you. You can easily recreate this ombre effect following this quick ombre buttercream tutorial. Once it’s done, use a cake comb to recreate the same texture. You can follow this drip cake tutorial if you’re not familiar with the process. Also, if you’re not comfortable with macarons and cakesicles, you can easily replace them with ball cake toppers of the same color.


No comments:
Post a Comment